A healthy lawn enhances the overall appearance of your home and provides a pleasant environment for family and friends to enjoy.
It’s important to understand how your lawn grows, what causes bare spots and what treatments are most effective. Proper soil management, watering and mowing are crucial to the health of your yard. Contact Big Green Lawn Care for professional help.
Aeration is the process of mechanically removing small plugs of soil and thatch from your lawn using a machine called a core aerator. This allows more oxygen, water and nutrients to reach the roots of your grass, which promotes thicker, healthier turf. Aeration is a key part of Lawn Care because it alleviates soil compaction, reduces thatch build-up, and improves the absorption of fertilizers.
Compacted Soil
Over time, soil can become compacted due to heavy foot traffic or use of equipment such as lawn rollers. Regular aeration breaks up this layer of tightly packed earth and provides space for grass roots to grow. This improves the absorption of nutrients and water by the root system and reduces weeds.
Thatch Build-Up
Thatch is a layer of dead and living plant material that builds up on the topsoil surface, blocking water and nutrients from reaching the soil beneath. Aeration removes this layer and promotes healthy grass by increasing the surface area of roots, which encourages them to develop more aggressively.
The best time to aerate your lawn is in the fall for cool-season grasses, and spring through early summer for warm-season grasses. This will give the grass a chance to recover before going into its dormant phase. It’s also important to mark any sprinkler heads, shallow irrigation, septic or utility lines before you begin aerating your lawn.
Whether your yard is made of sod or has natural grass, aeration is an important process for your lawn’s health. Grass needs to be aerated in order to ensure that it can absorb the full spectrum of lawn treatments, including fertilizers and water.
Aeration should be performed in the spring or fall, and can be done manually or with a machine. Aerating your lawn too frequently can be harmful, so it’s important to only aerate when the lawn is in its peak growth period.
Fertilization
A properly fertilized lawn provides critical nutrients that support grass growth and resistance to environmental pressures such as weeds and disease. A well-fed lawn is more resilient, and its dense roots help suppress weeds, reducing the need for herbicides. Regular fertilization is a critical part of your lawn care regimen and can be accomplished using organic or inorganic materials.
Lawn nutrient needs vary throughout the year. Performing a soil test helps to identify the specific nutrient needs of your lawn. Once the results are available, you can create a fertilization schedule that best suits your lawn and its growing season.
Fertilizers come in many forms, including granular and liquid, and they contain different combinations of essential nutrients. For example, a basic 20-5-10 lawn fertilizer contains 20% nitrogen (N), 5% phosphorous (P) and 10% potassium (K). Nitrogen promotes leafy green growth, phosphate encourages seed germination and root development and potassium enhances nutrient uptake and helps with disease resistance.
Using the right type of fertilizer for your lawn is important, as is applying it at the correct time. The ideal time of the year to apply fertilizer varies by region and turfgrass species, but spring and fall are the most common seasons for lawn fertilization in Illinois.
In early spring, your lawn requires a balanced N-P-K fertilizer to support the delicate balance of sprouting new top growth and establishing strong root systems. Later in the spring, you can switch to a higher nitrogen fertilizer that will provide a burst of growth for the warm summer months.
A balanced N-P-K fertilizer will continue to sustain your lawn through the summer heat, keeping it healthy and green. Late summer fertilizers with a low nitrogen content prepare the turf for winter, while high-potassium fertilizers help with disease resistance.
We recommend that you lightly water your lawn before applying any fertilizer, as this will help ensure that it is absorbed quickly and evenly. Adding mulch or rock to your lawn after fertilization will also help to keep the nutrients in place and prevent soil runoff. It is also helpful to avoid fertilizing your lawn during extremely hot or cold weather conditions.
Mowing
The lawn is an integral part of your home, contributing to your property value and providing environmental benefits. A healthy and well-maintained lawn can improve the appearance of your home, while also reducing soil erosion and improving air quality. However, new homeowners often struggle with lawn care, especially if they don’t understand the basics of mowing, watering, fertilization, aeration, pest management, and weed control. This guide to lawn care provides the information you need to get started on your road to a beautiful, healthy yard.
Mowing is one of the most important aspects of lawn care, as it prevents grass from becoming too long and unkempt and helps to control weed growth. Ideally, mowing should be done weekly during the growing season, with the mower height being adjusted based on weather conditions and the type of grass. Watering the lawn regularly and using efficient techniques to minimize evaporation help to keep the soil moist and prevent diseases. Fertilizing the lawn 1-3 times per season with a product formulated for your specific soil test results and grass type is also key to maintaining a healthy, green lawn.
Keeping the lawn free of thatch and debris is essential to prevent fungal disease, and proper mowing practices, soil aeration, and weed control can all help to keep the thatch layer at a minimum. Integrated Pest Management is critical to protecting your lawn from harmful insects, such as turf caterpillars and grub worms, and regular monitoring of the lawn will help to detect signs of pest infestation early on.
Lawn disease is another major concern that can affect the health of a lawn, causing discolored patches and streaks on the grass. A combination of factors can contribute to disease, including poor drainage, nutrient deficiencies, and overfertilization. Diseases can be controlled with lawn care techniques like mowing, aeration, and composting, and chemical treatments are available for managing severe outbreaks.
Other aspects of lawn care include soil testing, aeration, weed control, pest management, and seasonal maintenance. Maintaining these practices will ensure a vibrant, lush lawn that enhances the beauty of your home and helps to protect the environment.
Weed Control
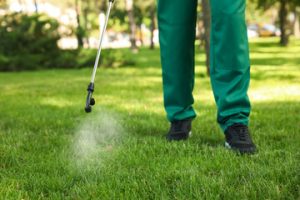
Weed control is an important part of lawn care, since weeds compete with grass for resources and can weaken the turf. Weeds can be controlled using preventative measures such as mulching around garden beds and applying pre-emergent herbicide in spring, and regular mowing, watering and fertilization practices that keep the grass dense enough to compete with the weeds for nutrients.
Lawn care specialists also use a variety of weed killers that offer either pre- or post-emergent control of both broadleaf and grassy weeds. Pre-emergent weed controls create a barrier underground to stop weeds from growing, and post-emergent weed killers kill weeds that are already above ground so they don’t go to seed and become a recurring problem.
Most weed seeds are dispersed by wind, water, animals and lawn and garden equipment. Annual weeds typically grow, produce seeds and die within one year, while biennial weeds spend the first year developing vegetative growth and the second year producing flowers and seeds. Weeds that are left to flourish in a lawn or garden can quickly overtake it, and can be difficult to kill and remove.
Grass plants need ample nutrients to thrive, but if the weeds are soaking up those nutrients, then the grass will struggle to survive and may not even be able to grow. Lawn care specialists can help improve the health of a lawn by treating it with the correct fertilizers, fungicides and other products, such as thatch removing treatments.
Other services offered by professional lawn care companies include addressing soil quality and disease management, which can also contribute to poor grass health. These professionals conduct soil tests to determine the nutrient levels and pH level of the soil, as well as address issues like compaction and drainage. They can also add organic materials to the soil, which helps improve its health and structure.
A well-groomed, healthy lawn is attractive and can help increase the value of a home. But it takes time and effort to maintain, especially if you don’t know what the proper techniques are. A lawn care specialist can help you make your yard the pride of the neighborhood by combining best practices in mowing, watering and fertilization with proper weed control, thatch removal and soil health improvements.