Hardwood Floor Refinishing Bergen County NJ breathes new life into floors and adds precious years to their lifespan. It’s a costly project, but it is well worth the investment.
Before starting, furniture must be removed from the room being refinished. This also includes removing baseboard molding. This can be a time-consuming task and it’s best to leave this to a professional.
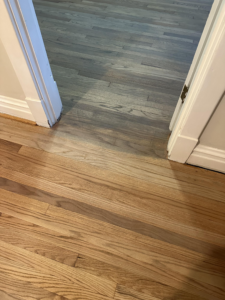
Sanding
If your floors have a significant amount of surface scratches and dents, it is time for sanding. Sanding will remove the top layer of finish that protects the wood and leave you with bare timber. This is a messy job and it is recommended that you hire professionals to do the job. They will know exactly how to do the job safely, quickly and effectively.
Before the sanding begins, it is important to prepare the area. Tape over all electrical outlets and vents to prevent dust from blowing into other rooms. Also, remove furniture and cover any doors with plastic to avoid snagging on nails. Once the sanding is complete, it is important to vacuum the area thoroughly to eliminate any remaining dust particles. This can take a few hours to do properly and will make your floors look much better.
Once the floor is completely sanded and vacuumed, it is ready for the staining process. Staining is done with polyurethane or a natural oil-based stain. Polyurethane is a good choice as it is durable and has a quick drying time. It is available in different sheens ranging from matte (low luster) to high gloss. Natural oils have become more popular lately as they are environmentally friendly and give the floor a warm and natural look.
It is best to do the staining process while the floors are still sanded and dry. This will allow the stain to penetrate the pores of the wood and not sit on the top surface of the sanded hardwood. Once the stain is dry, it is important to buff the floors again with a buffer to remove any rough spots and prepare them for the final coats of polyurethane.
Buffing
Over time, wood floors can lose their top protective layer. This is due to everyday wear and tear – dirty shoes, dog nails, furniture dragging and scratching – which causes this layer to thin. This leaves the floor vulnerable to damage and dingy looking. By buffing and re-applying the top protective coat, the flooring will look great and last much longer before a full refinish is needed.
This is one of the most common fixes for hardwood floors and it’s very affordable as well. Buffing is a surface finishing process that smooths and polishes a substrate, enhancing its shine and luster. It also eliminates minor scratches and scuff marks on the surface, rejuvenating its appearance. It is often used on wood floors, but it can be applied to other materials such as metals and plastics.
To buff a floor, you’ll need a machine that can be rented from your local hardware store. Before starting, clear the area to work in and protect it with masking tape and plastic sheeting to avoid staining furniture and walls. These machines are very high-powered and can cause serious injury if you’re not careful. Ensure that you have a good grasp of the operation before using it.
A buff and re-coat should be part of a regular maintenance plan for all hardwood floors. This is a very cost effective way to protect your investment and extend the life of your wood. It’s like putting on sunblock to protect your skin from the elements – you need to apply it regularly, or it will be too late once you start getting burned. It will also help if you’re thinking about selling your home in the future. The shiny finish will make the home look brighter and can increase its value.
Polyurethane
You can find a polyurethane wood floor finish at most hardware stores. There are many options available including water-based and oil-based, the choice will depend on your cleaning and maintenance routines and the look you want. The polyurethane will protect the hardwood floor and keep it looking new. It’s best to apply three coats of the finish and sand between each coat. This will give you the best results and longevity for your flooring.
When you’re ready to recoat your floors, be sure that they are clean and completely dry before you start. It’s also a good idea to open windows and doors to help the air circulate and keep any fumes from lingering in the room. Always follow the manufacturer’s instructions and test an area of the floor for color and reaction to the finish before applying it to the entire floor.
It’s important to remember that the top layer of your wood floor is a sacrificial layer. It is designed to protect the hardwood underneath it and will be scratched and gouged over time, as well as from furniture and regular use. If you notice that the protective layer is wearing down to the wood underneath, it is a sign that it’s time for refinishing.
Be sure to follow all the manufacturer’s instructions and work in a well-ventilated area when you are applying the polyurethane, it may emit toxic fumes. Be sure to wear a respirator and eye protection as well. A good tip is to mix the polyurethane and stir it frequently, rather than shaking it, this will help to eliminate bubbles and achieve a more even coat. If you’re using an oil-based finish, be sure to soak your brush in mineral spirits prior to application.
Varnish
Over time the protective layer of your wood floors will begin to thin, making your floors more vulnerable to scratches and dulling. Regular buffing and re-coating will help prolong the life of your floor without needing to refinish it. It’s a lot like putting on sunblock before you go outside – if you wait until your skin is already sun-burned it will be too late.
Varnish is a liquid coating material that dries to a hard, transparent film. It is used to protect and enhance wooden surfaces such as furniture, paintings and doors. It can be either water or oil-based, and is often formulated with resins, drying oils, driers and volatile solvents.
The main difference between varnish and lacquer is the sheen level of the finish, with varnish having a more traditional satin sheen than lacquer, which can have a sheen that ranges from high gloss to ultra-matte. Varnish offers protection from chemical damage, such as acids and alkali, physical damages like scuffs and dents, and provides UV protection that helps prevent color fading.
To apply varnish, a clean lint free cloth should be used to wipe the product on. If you’re new to brushing varnish, it’s recommended that you practice on scrap plywood first, using long, steady strokes. Avoid rubbing too hard, as you can create bubbles in the finish that will show when it dries.
Once the varnish has dried, you should lightly sand with 220-grit sandpaper and vacuum the dust with a tack rag. It will then be ready for another coat of varnish. Make sure to keep the room warm and dry between coats, and allow each coat to fully cure before applying the next one. It may take up to 24 hours for oil-based varnishes to completely dry, and it’s important that you remove all furnishings, quarter round trim, vent covers and pictures to ensure proper ventilation.
Installation
Hardwood floors are a beautiful addition to any home, but over time they can become scratched and dull. Resurfacing or refinishing is one way to restore your floor’s appearance and extend their life. The best method depends on the condition of your floor and your desired look. For example, refinishing may be necessary to change the color of your hardwood floor. However, if your floor has deep gouges and discoloration, resurfacing might be a better option.
Refinishing can be done on solid 3/4-inch hardwood or engineered wood, but it’s best to leave this project to the professionals. Engineered wood has a layered construction and a thinner wear layer than solid hardwood. It’s also important to note that refinishing will cause dust to gather in unprotected areas of your home, so it’s best to cover vents and seal doorways with plastic sheeting.
Before refinishing your hardwood floors, remove all furniture and other items from the room. This will allow you to focus on the job at hand and avoid re-sanding unnecessary areas of your floor.
Once the sanding process is complete, it’s a good idea to vacuum your floor and sweep any remaining dust particles from unprotected areas. It’s also important to install base shoe moldings and quarter-round trim to protect the edges of your new finish from damage.
It’s also important to choose a high-quality hardwood floor finish for your refinishing project. A water-based polyurethane dries quickly and is easier to clean up, while an oil-based poly is slower to dry but allows you to create a smooth, glossy finish. Be sure to read the product labels carefully and follow the manufacturer’s instructions for use.