Changing the furnace filter often helps, but some problems require expert service. For example, strange smells could indicate that the furnace is burning gas incorrectly. This is a potential safety hazard and needs to be addressed immediately by an HVAC specialist like Cincinnati Furnace Repair.
A puddle near the furnace is a sign of a water leak, which may be a severe problem that requires professional repairs. This should be fixed as soon as possible to avoid more costly damage.
A thermostat is a complex piece of equipment, and one that can be difficult to diagnose. If you’re noticing that your furnace is turning on and off at irregular intervals, this could be caused by an issue with the thermostat itself.
Your thermostat is designed to pick up on the temperature of your home, and then signal when it’s time for your system to start a heating cycle. However, if it isn’t picking up on the right temperature, it will start to produce heat when you don’t need it. This will also cause your system to turn off before the room has reached its ideal temperature, leading to wasteful energy spending and an inefficient system.
There are a few simple things you can do to make sure your thermostat is working properly. First, check the power switch directly connected to the unit. It may have been accidentally flipped off. Also, check the flame sensor rod to make sure it isn’t coated in residue. Clean it with an emery cloth or put in a new one if necessary.
Another thing to check is the fan limit switch. This is a small white button that controls the fan’s ability to run continuously or not at all. If it’s pushed in, your fan will run all the time, raising your energy bills and causing excess wear on the motor. If you find it, simply pull the button out to reset it.
A strong burning smell coming from your vents can be a sign of poor combustion. This can lead to carbon monoxide poisoning, so it’s important to call a professional right away.
The heat exchanger is an important part of your furnace that keeps the air in your home warm and free of contaminants. However, it’s also one of the most expensive parts to repair or replace, so it’s important to keep an eye on it and keep it well-maintained. Some signs that you need to replace your heat exchanger include a lack of warm air coming from the vents, clunking noises, or a burning smell.
Ignitor
A malfunctioning furnace ignitor can affect the heating process in a variety of ways. From preventing the furnace from turning on altogether to forcing it into constant cycles of starting and stopping, delayed ignition can lead to serious safety risks that you should never ignore.
To troubleshoot the problem, first flip your electrical power switch to shut off your furnace. Then open the furnace’s combustion chamber cover and remove its hatches. This will give you access to the combustion chamber and pilot system. You should see a pilot light on top of the burner assembly, and an electrical component called the ignitor below it. The ignitor creates the spark that ignites natural gas inside the pilot light tube, which then mixes with air to heat your home.
If you notice the flame in your pilot light has a yellow tint, it’s likely time to call a professional. Yellow flames indicate that the pilot system is clogged with debris or leaking gas and needs immediate attention. If you want to try a quick fix, switch the gas supply valve to off and then turn it back on, but don’t inhale during this process.
You can also try relighting the pilot light with a lighter or match, but this is only a temporary solution. The ignitor is probably faulty and requires replacement. To find the ignitor, look for a small red piece of metal attached to the sleeve of your furnace. It may have a wire leading to it, which you can use to manually fire up your furnace.
Other signs that your ignitor is bad include loud clicking noises coming from the blower system and an inability to feel hot air through the ductwork. You should also check the blower drive belt for cracks or frays, as these can cause clunking and scraping sounds.
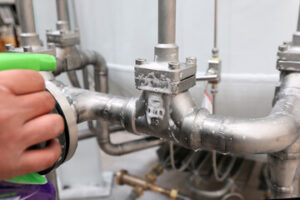
You should also pay special attention to your gas supplies and valves, which are responsible for opening up when the ignitor gets hot enough. A faulty gas supply or valve will prevent the ignitor from triggering, which could be an indication that you have a dangerous leak and should call in a professional.
Burner
Your furnace’s burner is responsible for converting natural gas into warm air. As such, it’s essential that your furnace’s burner be properly maintained. Over time, dust and dirt can accumulate on the burners and reduce their efficiency. This can lead to high energy bills. Dirty burners can also be a fire hazard. The flame in your furnace should always be a blue color, but if it becomes yellow or flickers, this can indicate incomplete combustion and could cause carbon monoxide poisoning.
To prevent this from happening, you should clean your burners on a regular basis. This can be done by using a vacuum cleaner with a brush attachment. Be sure to follow the manufacturer’s guidelines when cleaning the burners. You’ll also need to shut off your gas supply before you begin.
You should also check your furnace’s door switch to make sure it’s in the on position. This will prevent your system from running if the door panel is open or unhinged, which is a potential fire hazard and a significant safety risk.
The air and gas metering controls on your furnace can also become dirty over time. These are located on the side of the burner assembly and can be adjusted by rotating them. However, once the manufacturer sets these controls, you should not adjust them again except to replace parts. This will create an imbalance in your furnace’s air-to-gas ratio, which will result in inefficient heating.
Another possible reason for ineffective heating is a faulty thermocouple. This is an important part of your furnace’s ignition process, and it can be difficult to diagnose. This can be caused by a number of factors, including a corroded thermocouple rod, an electrical problem, or a bad thermostat.
If you suspect that your thermostat is having an issue, try flipping the breaker to the off position and then back on again. This can help if the thermostat is accidentally set to “Off.” If the problem persists, contact an HVAC professional. It may be necessary to replace the thermocouple. However, this is a job best left to an experienced technician.
Filter
A clean filter keeps dust, dirt and other contaminants from clogging your furnace and keeping it running efficiently. But it also improves air quality and helps you breathe easier, particularly if you have respiratory problems. Changing your furnace filter is an inexpensive, easy, and vital maintenance activity.
Before you can install a new filter, turn off your heating system. This ensures that you don’t accidentally damage your system or injure yourself by exposing yourself to a live electrical current. You may need to refer to your owner’s manual or online resources to find where the filter is located in your system. Once you locate the filter, carefully remove it and make a note of its size. This information is usually indicated on the filter frame or in a label within the filter slot. You may need to measure the size of your old filter with a tape measure to determine what size to purchase for your replacement.
While it’s a good idea to change your filter at least once every month, you should check it more often if it looks like it’s dirty. You should also look for signs that it’s time to change your filter, such as increased dust around your home or a longer-than-usual cycling time when the HVAC system is on.
A dirty filter can cause your system to short cycle, which can be damaging to the system. It can also lead to uneven heating in your home and increase wear and tear on the blower motor. If you notice any of these issues, schedule a furnace repair as soon as possible.